Wasteland 2 Director's Cut - Ag Center (rescue mission)
-- Including how to get initiative over Dr. Larsen!
Play Wasteland 2 risk-free with money-back guarantee from Good Old Games.
Gamepressure is a good place for maps for the Ag Center amd the Ag Center Central Complex but it doesn't have a lot of notes on the area and
A great place for maps and general information for Arizona is . Here, we provide additional information about the various locations, and/or specific to the Director's Cut.
There are two versions of the Ag(riculture) Center: If you choose to rescue it and let Highpool be destroyed; or if you choose to rescue Highpool and instead let the Ag Center be destroyed.
The choice is not triggered until team Echo One moves far enough south from Ranger Citadel, whereupon they receive a distress call from both locations. This is independent of whether they are following the main quest and have the Repeater Units to install at the radar dishes. There is also a time limit before both locations are destroyed; a second warning distress call warns of this.
We talk about the more complicated Rescue first but a lot of the notes (e.g., about the pods) will still apply.
Active skill checks here are quite high, with typically level 4 challenges. Some are very high but typically there is an alternate route, though you will miss the XP if you do not go back to take the challenge.
Some trinkets may be randomly available that will raise your skill by 1 point, which may be just enough to attempt a challenge at the minimum (10+Attribute)% chance of success. To attempt to complete all challenges, raise your skills to level 2 before starting, and save some skill points to strategically raise a skill to 3 if necessary. If you absolutely want to get all XP, you need Smart Ass 4 and Surgeon 4 when talking to the boss Larsen.
General
Disarming the Plants
Rescue - West Field
Rescue - East Field
Cattle Pen
Larsen
-- Including how to get initiative over Dr. Larsen!
Play Wasteland 2 risk-free with money-back guarantee from Good Old Games.
Gamepressure is a good place for maps for the Ag Center amd the Ag Center Central Complex but it doesn't have a lot of notes on the area and
A great place for maps and general information for Arizona is . Here, we provide additional information about the various locations, and/or specific to the Director's Cut.
There are two versions of the Ag(riculture) Center: If you choose to rescue it and let Highpool be destroyed; or if you choose to rescue Highpool and instead let the Ag Center be destroyed.
The choice is not triggered until team Echo One moves far enough south from Ranger Citadel, whereupon they receive a distress call from both locations. This is independent of whether they are following the main quest and have the Repeater Units to install at the radar dishes. There is also a time limit before both locations are destroyed; a second warning distress call warns of this.
We talk about the more complicated Rescue first but a lot of the notes (e.g., about the pods) will still apply.
Active skill checks here are quite high, with typically level 4 challenges. Some are very high but typically there is an alternate route, though you will miss the XP if you do not go back to take the challenge.
Some trinkets may be randomly available that will raise your skill by 1 point, which may be just enough to attempt a challenge at the minimum (10+Attribute)% chance of success. To attempt to complete all challenges, raise your skills to level 2 before starting, and save some skill points to strategically raise a skill to 3 if necessary. If you absolutely want to get all XP, you need Smart Ass 4 and Surgeon 4 when talking to the boss Larsen.
General
Disarming the Plants
- Exploding Pods explode harmlessly, impassable vines can be cut, and people trapped in vines are automatically freed when both East and West Field main tasks are completed.
- Each of the persons trapped in vines ends up in the infirmary on a bed. You can use the Surgeon skill on them again there.
- Prior to this, completing East Field only or West Field only will give you the same benefits in that area only.
- There is a safe distance you can approach which causes the pods to start pulsing. At that maximum distance a pod will explode but not catch you in the blast.
- If you flee quickly before a pod explodes, it will calm down and not explode.
- In combat
- If you are within a pod's trigger radius it will go through its regular build-up-and-explode sequence even if you are just waiting to just more of your Action Points and have not ended your turn.
- Therefore, if an enemy is close by you can move closer, let the pod explode and hurt the enemy, then move in to attack the now hurt enemy unit.
- If you cause it to explode, you get XP for whatever the blast kills.
- If you cause a pod to explode outside of combat, even if the blast harms someone combat will not initiate.
- After the mutagen is stopped from spreading from within the complex, all exploding pods harmlessly and immediately explode when you come within the trigger radius.
- BUT if you damage them while in combat, they explode normally, and will inflict damage and Infection as well. If allowed to explode because you are close by, they explode harmlessly in or out of combat.
- Some pods are close to containers so you may want to avoid them until you can get them to explode harmlessly since that will damage contents. If you get "glass cans" or "glass shards", then the container was probably damaged and you're basically left with debris.
Mutant Animal Encounters
- The time it takes them to notice the players is quite long, so you can sometimes slip past them even though you are quite close. In this way you can avoid combat to position in a tactically better location first.
Rescue Missions
- Sometimes people will be surrounded by mutant animals, and everyone is waiting for you to get close to initiate a cutscene, whereupon the animals attack until you get their attention.
- If you are having trouble saving these hostages, don't approach too closely. Instead, shoot one of the monsters from a distance to initiate combat and draw them all to you. You'll miss the cutscene, but you can always do this from reloading the game.
Rescue - Central Complex
Kathy
- If you ask her early about the radar dish you need (topic "Signal") you get to use Kiss Ass 2 for some XP. Otherwise if you ask later she is obviously not upset but you don't get any XP either.
- Matt stops trading from the time you give Kathy 10 Exploding Pod Fragments. He resumes trading once you give her the Fungicide from the underground mushroom area. He's the only trader at the early stages of the Ag Center rescue, so before you give Kathy the fragments, you may want to:
- Sell junk to Matt first.
- Ask Rose to join as a packmule.
- Get the fungicide from the mushroom farm downstairs, which is required to complete her cure for Matt, which restores him as a merchant.
- He will eventually give you access to his room and safe as a reward for helping the Ag Centre. If you break in first and wear his Ranger Star (labelled with his name), he will remark on that but apparently not do anything.
- Can be recruited early if you Brute Force down her door. Otherwise you will have to wait until you give Kathy 10 Exploding Pod Fragments, at which time she enters Rose's lab with Matt and Matt stops trading.
- She has the control codes for the airlocks but whether she is in your party or gives them to you, you can manually open the airlocks with Computing Science or Safecracking by choosing the skill from a hotkey and manually targeting the airlock.
- The is a pod near a safe and no way to reach it without the safe being blown open by the exploding pod, unless you have already finished the quest tasks in the East and West Fields. At that point you can use Safecracking on the safe and get its contents.
Room next to Winston
- The is a pod near a safe and no way to reach it without the safe being blown open by the exploding pod, unless you have already finished the quest tasks in the East and West Fields. At that point you cannot actually interact with the safe and get its contents unless you smash it.
- One Exploding Pod is at the entrance to the supplies and there are explosives buried in the ground. If you want to disarm the explosives for XP you need to turn off the mutagen first, rendering the pods harmless.
Sue
- Even if you discovered he has been spreading mutant seeds via pigeon by following the pigeon shit/pigeon coop topics, you can still get dialogue XP by asking about the suitcase under his bed. This will lead to the same dialogue again.
- If you Kiss Ass 2 you can ask him to join you in killing the rabbits.
- If you do not immediately use the skill option conversation will move on and you won't get to ask again.
- If he joins, conversation immediately exits and you cannot talk to him until you have killed all the rabbits. Then he leaves and goes to a melon patch where you can resume your conversation.
- If you leave the area before the rabbits are killed, Lewis will not follow and will disappear from West Field.
- The mechanism to fix the pump has an Exploding Pod nearby with containers inside its blast radius. If you go and get it, the pod will detonate and damage the contents. Instead, just to the Ventilation System building and look for the computer against one of the walls. You will need to manually target the Computer skill on it to hack.
Cattle Pen
- If you attack any rabbit quickly enough, they all disengage from the cattle to attack you.
- Each cattle that remains can be Animal Whispered to follow for the CATTLE DRIVE perk (+1 Coordination), but more than two and you start automatically releasing existing animals.
- You can tip a cow with the Brute Force skill. Once tipped you cannot Animal Whisper them but you can release them from following you and then tip them for XP.
- Perception 2 is needed to spot the booby traps in cow dung.
Larsen
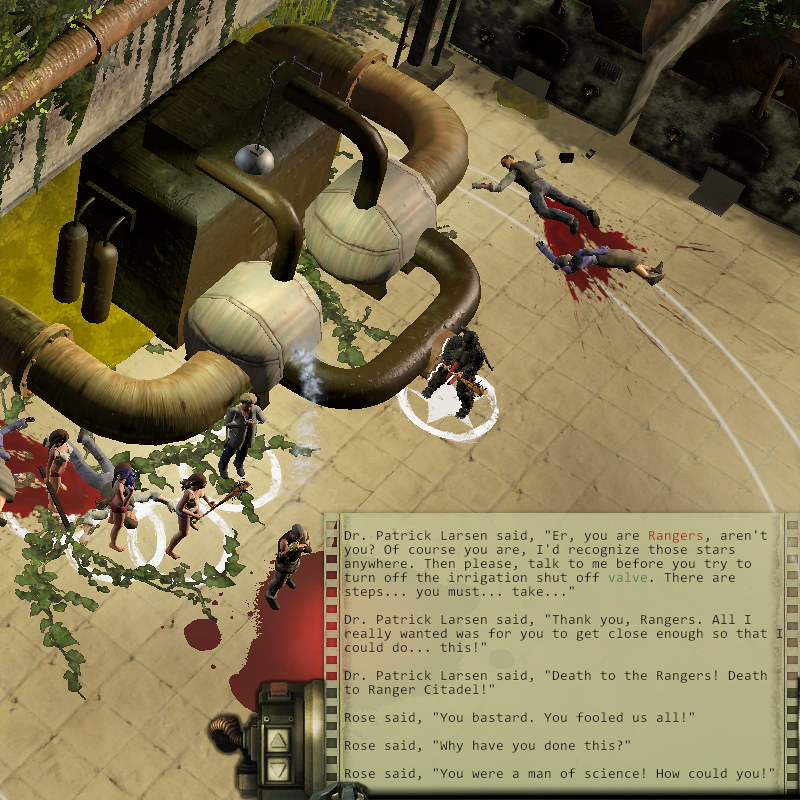
- You cannot shoot Larsen first without it being counted against you as shooting non-combatants.
- Smart Ass 4 and Surgeon 4 can be used to get XP in dialogue but is not necessary.
- No matter what, he exits dialogue and goes first even if your initiative is higher. He can shoot 4 times with his gun (toned down from previous versions where he could shoot 6 times and had 200 CON).
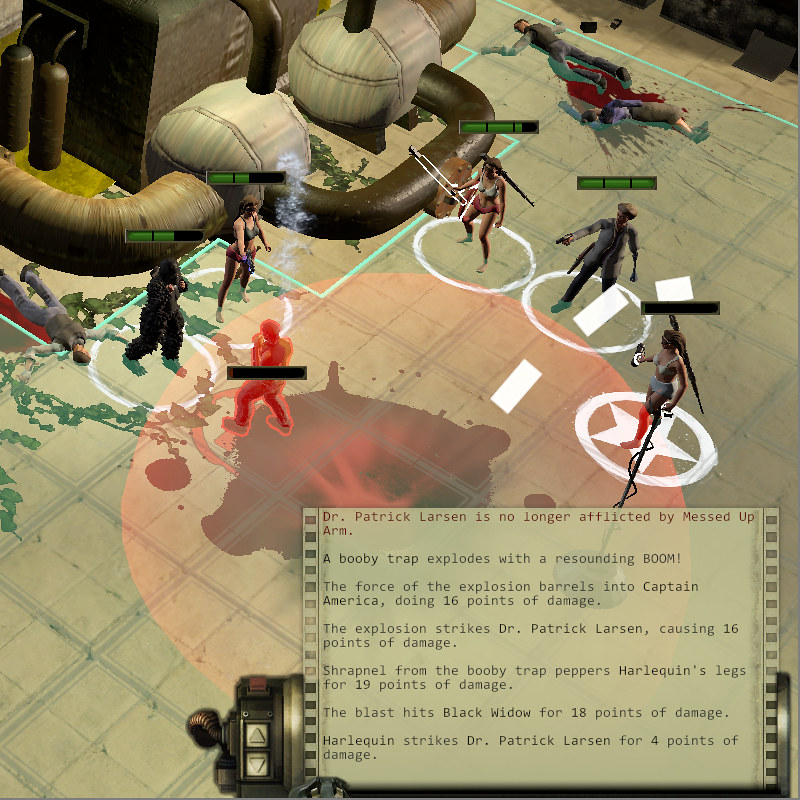
- If you manage to Precision Shot his arm until he gets the Ruined Weapons effect, the combat log will show that a booby trap explodes for about 15 damage, and he will lose his gun (even though there will be a gun in his inventory after he dies).
- When Larsen dies, his "Atomic Heart" explodes for about 8 damage in a wide radius. You can try to run out but the game determines that you were in the blast radius and will still damage you.
- If you are having trouble:
- Position all characters behind him before initiating conversation. Have one character go to turn off the valve -- do not talk to him. Using the valve will force conversation with Larsen. Use the "Goodbye" option in conversation as soon as possible.
- When conversation exits, Larsen will stand up and now be hostile, BUT he is facing the wrong way and therefore is not yet immediately aware of any characters. You then get first strike, so make it count -- e.g., Try to have everyone shoot him all at the same time. Even if your characters have an impossible 10 in all Attributes and all Skills, he will go first when combat formally starts.
- Once combat starts, try to position your characters so that there is an open side and you can drop and explosive, such as a pipe bomb, not on him but NEAR him to include him in the blast radius but exclude nearby allies who are probably bleeding to death after his point blank range shots (see picture below for sample pipe bomb placement).
- If you have Animal Whisperer pets nearby be careful they don't get caught in the blast. You have maybe a second after Larsen dies to move everyone out of the blast radius.
Destroyed
The Destroyed Ag Center (exterior map, interior map) is much more straightforward as all you can really get to is the Satellite Dish to check it.
Kathy Lawson tells you of the infected settlements so pick up the cure and go there. You cannot apparently disinfect Ag Center itself.
Larsen
The Destroyed Ag Center (exterior map, interior map) is much more straightforward as all you can really get to is the Satellite Dish to check it.
Kathy Lawson tells you of the infected settlements so pick up the cure and go there. You cannot apparently disinfect Ag Center itself.
Larsen
- Tighter space so harder, especially for keeping Animal Whisperer pets alive. Send everyone to the entry and have an armored person talk to him.
- You actually have a slight chance of attacking before combat actually starts. As soon as dialogue finishes, click him to attack. If everyone has a gun (except maybe the person talking to him) they might all get a shot off and that could kill him outright before he even gets to attack.
- If you get to move the person closest to him (and whom he likely shot first), there's a good chance he'll choose a different target, thus spreading out the damage and allowing your team to survive without anyone going down.
Infected Settlements
In both the Rescue mission and the investigation of the Destroyed Ag Center, there is the follow-up mission to bring a cure to the locations Sue inadvertently infected. For the Destroyed Ag Center, you are told of them by Kathy Lawson, and when you are close you will get a call from Ranger Citadel and the location appears.
The settlements are all basically the same, except flies are weaker if you Rescued the Ag Center.
- Infected Farm NW of Ag Center (map)
- Try to rush away from the cows, hugging the side of the map away from the infected monsters. That should draw the monsters away from the cows during the battle, if you want to save them for the CATTLE DRIVE (+1 Coordination) perk from using Animal Whisperer.
- Infected Settlement at the pass NE of Ag Center (map)
- Go to the highest building near the crane -- a small square house with a chest on the roof. From that vantage you can shoot better, are harder to be spit at by flies, and none of the infected critters know how to climb ladders so they can't follow you. You may need one person to lure the Pod People around so that they won't explode too close to you, though. Also, any Animal Whisperer animals can't climb up either so be careful they don't get caught in a Pod Person explosion.
- Safe is Lock level 5 or you can get a key from the Sheriff.
- Infected Pump Station in radiation zone south of Ag Center (map)
Comments
Post a Comment