Click here for a list of our Beyond Divinity Elite Hardcore Strategy Guide posts.
We recommend you buy Beyond Divinity from Good Old Games (GOG) as you can get more prompt support. Also, it is an older game, and GOG offers a risk-free money-back guarantee.
Act 2
Earth Elementals
We recommend you buy Beyond Divinity from Good Old Games (GOG) as you can get more prompt support. Also, it is an older game, and GOG offers a risk-free money-back guarantee.
Act 2
- Starting level:
- Using the Battlefields but without using Wisdom, we exited Act 1 at Level 14 without using the Wisdom skill. Enemies were of a slightly higher level (e.g., Level 9 mutants, level 15 Ancient Stone Biters).
- Without Battlefields, but having killed all the Rats, we started Act 2 at level level 11. Mutants were level 8, Ancient Stone Biters level 12.
- Many vermin are of a fixed level, and some are fixed at level 1 so you can't get XP from them no matter what, or shortly after you are into this Act, except the irritation they cause will follow you around everywhere.
- One of the things to watch out for throughout this act is pathfinding. Sometimes one or both characters will suddenly swing wide because there is impassable terrain and not enough width for both characters at the time their path was calculated. If you're not paying attention, this can leave one character solo in a fight or pull enemies you aren't ready for.
- We will be shooting much more here, so again a high Agility build benefits us by giving us strong archery. Where possible we will actually melee just out of principle (saving expendable resources) and we will provide melee tactics. But honestly, many enemies are so annoying that you really just want to shoot them.
- Unless you want to drink Mana Potions like water (any why not since you have probably over 100 if you didn't use any in Act 1), you still need strong melee or ranged attacks. We will use magic, but our paradigm is still not to use expendable resources unnecessarily, so it is in reserve.
- Apparent barriers like large mounds of boulders are sometimes passable. However, if you engage enemies there, you risk their treasure dropping inside a rock or onto impassable areas, and impossible to pick up.
- Ending level:
- We finished this Act at level 20. We did not kill any neutrals nor did we exploit the Polymorph spell to get more XP (see below).
Character Development
Agility
If you haven't already, get your Agility to around 37+ to use Daggers (Agility 12 requirement + Agility 25 from Sharpening = Agility 37 requirement). Your damage rating should be respectable enough for you to stop and develop Intelligence for Mana or Strength for the Hero.
Magic
The [Wizard > Elemental Attack > Focused] and [Wizard > Elemental Attack > Spread] are no longer Mana efficient once you can use anything from [Wizard > Shaman Magic]. [Wizard > Shaman Magic > Weather Magic > Lightning Storm] is the earliest you can learn (Guide page 126) but it is weak without the Extra Duration/Extra Damage upgrade. Instead go for [Wizard > Shaman Magic > Weather Magic] from the Hermit in the Spider Forest (Guide page 98).
If you kept the Battlefield Keys from Act 1, you can immediately access the Battlefield in Act 2. Clicking on any of them will give you back your Battlefield access skill. This is however an exploit since your Battlefield skill was taken away. But since the whole concept of the Battlefield is an exploit anyway, you might as well set up your cache now. If you are worried about possible save game screw-ups through a possibly unintentional exploit, the first key is to the far west in a prison.
"Rats"
Agility
If you haven't already, get your Agility to around 37+ to use Daggers (Agility 12 requirement + Agility 25 from Sharpening = Agility 37 requirement). Your damage rating should be respectable enough for you to stop and develop Intelligence for Mana or Strength for the Hero.
Magic
The [Wizard > Elemental Attack > Focused] and [Wizard > Elemental Attack > Spread] are no longer Mana efficient once you can use anything from [Wizard > Shaman Magic]. [Wizard > Shaman Magic > Weather Magic > Lightning Storm] is the earliest you can learn (Guide page 126) but it is weak without the Extra Duration/Extra Damage upgrade. Instead go for [Wizard > Shaman Magic > Weather Magic] from the Hermit in the Spider Forest (Guide page 98).
- Even without these spells you can get through this Act just fine with melee and bow, so feel free to first reach the ultimate Agility target of 65 and/or develop some Strength and Constitution. If you absolutely insist, you can do some risky tactics to get through with melee only against some of the most annoying enemies to date.
- The damage numbers for spells are basically all incorrect. Experiment with the spells to find out what they can really do. Except Spikes, which can be hard to place, all the spells you learn from the Hermit are good so get at least 171 Mana to cast them.
- Insect Swarm is also very good in case you are yourself swarmed in melee; however, it costs 308 Mana and you will want to have more than that to also Heal yourself if necessary.
- Hammer is probably the best choice overall. Damage is strong, there is a moderate area of effect, and stun is more or less guaranteed -- making it better than [Wizard > Body Magic > Offensive > Paralyze] from the Plague Ghost (Guide page 90).
- If you are short on Skill Points, hold off on developing Lightning Storm until you read about Polymorph and Hammer, accessible later in this Act.
If you kept the Battlefield Keys from Act 1, you can immediately access the Battlefield in Act 2. Clicking on any of them will give you back your Battlefield access skill. This is however an exploit since your Battlefield skill was taken away. But since the whole concept of the Battlefield is an exploit anyway, you might as well set up your cache now. If you are worried about possible save game screw-ups through a possibly unintentional exploit, the first key is to the far west in a prison.
"Rats"
The "rats" in this area are Tibar and Stone Biters, both of which give a lot of XP initially. Also, Stone Biters also almost always drop treasure, often a potion. Tibar can also drop loot. You will shortly after get no XP from them at all and instead just be irritated, so you may consider not attacking them at all. For loot, just rob merchants with Pickpocket. It's faster and less irritating.
For our run, we played without killing Rats, so we will continue without killing neutral non-hostile Tibar and Stone Biters.
As "rats" they use the same tactics as Rats in Act 1, only it is much more effective here because there are swarms of vermin just about everywhere.
Actually pretty easy to kill if you Sneak and wait out their "fire aura" -- They go Berserk and can inflict crazy damage. They then become apparently immobile for a while during their Berserk cooldown but are restored to about half health afterwards.
Since they are easy to melee to begin with (if you followed our Character Generation guidelines and build, you are probably using Hunter's Knives or Daggers and have a Piercing damage rating of 100+), you can then finish them off safely.
The real "problem" is that they are too close to the Drunken Soldiers, who can charge in and fight -- and possibly steal your kill from you. So hug the far northern wall and lead them away first.
Unlike Skeleton Mages, they will not flee when they sight you, and instead try to Paralyze you. So try to isolate them with Sneaking and shoot them from out of their sight range. Contrary to the Guide (page 73), Sneak close and kill the Guards first if you can so you can concentrate on shooting the Mages (there will be two on Hardcore Difficulty) and backing out if you have to. Stay hidden by Sneaking!
Muro the Hunter - Traps
Although we will not be relying on Traps (because they are an expendable resource so we won't rely on you having any to use), you should consider training in traps because they are extremely useful in cheesy ways:
Click on the "Strange Chest" to experience a hallucination. Thereafter that piece of furniture will be locked. If unlocked with the Lockpicking skill, it will be empty.
There is a DIFFERENT Mushroom Farmer OUTSIDE this house. Speak with that one for a different quest.
Polymorph Spell (Guide page 90)
Have someone buy the [Wizard > Body Magic > Offensive > Polymorph] spell to ONE level only. Theoretically this gives you a lousy chance of polymorphing a target into a weak one, and a good chance a strong enemy may be polymorphed into a stronger one, like a Level 29 Shadow Creature.
This is actually a GOOD thing because:
In Act 3 you can get the "cloud" (area effect) version of this spell. It lasts half as long but can hit multiple enemies, so you can neutralize some temporarily into weak enemies while you kill the stronger ones.
The Hero's Wife (Guide page 89)
If you speak with her and receive this quest BEFORE you rescue the Imp Hero (Guide page 96), it will probably be bugged. After you rescue the Imp Hero and return to find him in the Imp Village, if you tell him about his wife the first time you speak with him in the Imp Village, he will run off but the cutscene won't end and you will not get player control back.
In such a case, when he speak with you, abort dialogue with the "X" button, until he starts the boast that begins, "Blood was flowing from hundred wounds...". Abort listening to the whole thing by clicking "1" to choose the dialogue option about his wife. You will then get XP for the The Hero's Wife quest and there will be a cutscene where he runs off. But this time you will regain player control.
If you let that last boast finish on its own, the game will automatically choose the dialogue option about his wife and the quest will complete, but you will not get XP.
Necromancer Task 1 - Abbey
For our run, we played without killing Rats, so we will continue without killing neutral non-hostile Tibar and Stone Biters.
As "rats" they use the same tactics as Rats in Act 1, only it is much more effective here because there are swarms of vermin just about everywhere.
Ancient Stone Biter
Since they are easy to melee to begin with (if you followed our Character Generation guidelines and build, you are probably using Hunter's Knives or Daggers and have a Piercing damage rating of 100+), you can then finish them off safely.
The real "problem" is that they are too close to the Drunken Soldiers, who can charge in and fight -- and possibly steal your kill from you. So hug the far northern wall and lead them away first.
Mage
Muro the Hunter - Traps
Although we will not be relying on Traps (because they are an expendable resource so we won't rely on you having any to use), you should consider training in traps because they are extremely useful in cheesy ways:
- They can be set at range:
- Even in the fog of war.
- Behind barriers.
- Not on impassable terrain, although you will still lose one unit of Trap Material.
- Not when a hostile creature is nearby, so you cannot use it as a direct attack. You can however set it in the path of a creature coming toward you while it is still a range.
- A single high-level Scorpion is probably the best trap:
- Once summoned, the Scorpions are mobile.
- Their poison does damage over time in addition to physical attacks.
- As a creature it can be your distraction while you Sneak off.
- It's repeated attacks will eventually kill several creatures, whereas a single-attack trap will probably not. Therefore, it has high utility per unit of Trap Material, and all traps cost a single unit of Trap Material.
- After the lengthy initial cutscene, immediately leave the Village so you can be kidnapped and sent to the Abbey (Guide page 125). This will happen even if you try to enter the Battlefields, although you will still be able to go to the Battlefields from the Abbey. Going to the Abbey also gets you access to the powerful Lightning Storm spell as well as a permanent +60 Mana boost. Once you are out you can set up easy-access Battlefield caching to-and-from the Imp Village and environs.
Click on the "Strange Chest" to experience a hallucination. Thereafter that piece of furniture will be locked. If unlocked with the Lockpicking skill, it will be empty.
There is a DIFFERENT Mushroom Farmer OUTSIDE this house. Speak with that one for a different quest.
Polymorph Spell (Guide page 90)
Have someone buy the [Wizard > Body Magic > Offensive > Polymorph] spell to ONE level only. Theoretically this gives you a lousy chance of polymorphing a target into a weak one, and a good chance a strong enemy may be polymorphed into a stronger one, like a Level 29 Shadow Creature.
This is actually a GOOD thing because:
- Extremely strong enemies, like Blood Knights in Act 3, always get transformed into easier-to-kill targets. Even a Level 29 Shadow Creature will be easier to kill, AND it will give a lot more XP.
- Weak creatures that don't give any XP anymore can be transformed into strong ones that will give XP. This is one way to get XP out of the hundreds of low-level neutral critters.
- Therefore don't bother with the Wisdom skill if you are short on XP. If you really want to maximize your XP, use Polymorph on weak critters everywhere.
In Act 3 you can get the "cloud" (area effect) version of this spell. It lasts half as long but can hit multiple enemies, so you can neutralize some temporarily into weak enemies while you kill the stronger ones.
The Hero's Wife (Guide page 89)
If you speak with her and receive this quest BEFORE you rescue the Imp Hero (Guide page 96), it will probably be bugged. After you rescue the Imp Hero and return to find him in the Imp Village, if you tell him about his wife the first time you speak with him in the Imp Village, he will run off but the cutscene won't end and you will not get player control back.
In such a case, when he speak with you, abort dialogue with the "X" button, until he starts the boast that begins, "Blood was flowing from hundred wounds...". Abort listening to the whole thing by clicking "1" to choose the dialogue option about his wife. You will then get XP for the The Hero's Wife quest and there will be a cutscene where he runs off. But this time you will regain player control.
If you let that last boast finish on its own, the game will automatically choose the dialogue option about his wife and the quest will complete, but you will not get XP.
Necromancer Task 1 - Abbey
- Despite what the Witch says, even if you spare all the Paladins by rushing or sneaking, Achim still claims you killed all his men, and the Paladins that were hostile remain hostile after you get the Crystal. So forgo stealth.
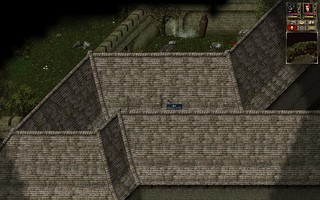
- Mouse-over the roof when you are at the north end of the compound to find Pits and other "containers" that may contain loot. This is the graveyard area, and a lot of it is obscured by the roof (see picture on the right for an example).
- Skeleton warriors and arbalesters use Bone weapons in melee. The Deathknight has a natural 30 Bone Resistance, so further improve that with the Crystal Bag and have him take point.
- Skeleton arbalesters have a respectable 21 Agility and therefore almost always hit, making them very dangerous in melee. They also swing pretty fast.
- Paladins and Skeleton warriors using Bone Clubs can hit remarkably hard.
- We did this right after first entering the Imp Village and before doing any quests there. We exited at level 14, which put us very far ahead of many monsters -- the Fire Area southeast of the Imp Village has the strongest monsters at level 15, while the Little Mushroom Forest to the north has the weakest at level 8 -- worth zero XP if we hit level 16. So we followed the Guide, which is probably also the intended path based on monster levels.
Little Mushroom Forest
Imp Elf (Guide page 94)
If you abort the conversation, you can decide later. But if you then pick up the mushroom, the Imp Elf becomes hostile. Before concluding this decision, you can Pickpocket him for 100 Splitting Arrows.
Spider Forest
Flamestinger (Guide page 100)
When you open the Spider Cocoon, a homing critter hops to you and explodes for well over 300 damage. If you are standing still when you open the Spider Cocoon, there will be an animation that will freeze you in place long enough for the critter to explode.
Instead, start very close to the Spider Cocoon. Click a location to run to far away and when the character is starting to move, pause the game, open the Spider Cocoon, grab the item, and the unpause the game to continue moving. The trap may not even trigger in this way.
This sort of grab-and-go is possible with any container that is close enough to you when you are running past.
Summoning Doll - Demon (Guide page 98)
The Hermit (Guide page 98)
Flamestinger (Guide page 100)
When you open the Spider Cocoon, a homing critter hops to you and explodes for well over 300 damage. If you are standing still when you open the Spider Cocoon, there will be an animation that will freeze you in place long enough for the critter to explode.
Instead, start very close to the Spider Cocoon. Click a location to run to far away and when the character is starting to move, pause the game, open the Spider Cocoon, grab the item, and the unpause the game to continue moving. The trap may not even trigger in this way.
This sort of grab-and-go is possible with any container that is close enough to you when you are running past.
Summoning Doll - Demon (Guide page 98)
When you have two Summoning Dolls, the second doll is summoned at the current location of one that is already summoned.
Have at least one character learn just 1 level of [Wizard > Shaman Magic > Nature Magic > Hammer].
Mushroom Forest- It almost always inflicts stun, which is basically the same as [Wizard > Body Magic > Offensive > Paralyze] except it is much more reliable.
- It can be targeted and it inflicts all its damage immediately, unlike many other Shaman spells that inflict damage over time and the target can wander out of the area, thus taking less damage.
- It has a decent area of effect, so if you are swarmed, drop this and take advantage of the Stun effect.
- Easier to kill than Fire Elementals, but once they start an Earthquake, you must either kill them fast to stop it before the damage is inflicted, or run out of the area.
- Damage from an Earthquake is dealt once the screen shaking stops, and the closer you are to the origin (the elemental), the more damage you take.
- You can bait them into using their Earth Cone attack (and flee sideways to quickly get out of it, although damage is low) or Earthquake (just run away) by simply getting close, but that usually involves not Sneaking, which is still advised when engaging to not pull more Earth Elementals to you.
- Sniping is the easier way to kill them of course.
- If you lead them too close to Imps, the Imps will attack and either kill them for you (you get no XP) and/or be killed by them. Imps from the Village are pretty tough but not invincible.
- Very tough to melee without some divide and conquer and lots of Sneaking to not pull too many enemies at once.
- Their Fire Circle is pretty wide and damaging, and doesn't care about how much Evasion you have. If you watch them you can sometimes realize they are about to cast it, and have your characters flee.
- You can let some of them spot you and chase you, then Sneak and heal before picking them off. If you are having a lot of trouble, Sneaking and sniping with bows is faster and cheaper than using area effect magic and drinking potions.
- You can also ease your time in melee by baiting it into using its Fire Circle attack or Whirlwind Attack and move out of the way.
- With just ~200 Health on your characters it can be hard to melee unless you can overwhelm it quickly with powerful attacks. Some tricks to use are to cast a Heal spell before your Health bar drops too low, as the heal-over-time will absorb some incoming damage as it heals.
- It moves slowly, so outdistancing it by running is easy to do, as is running out of melee to heal.
Invincible Imps
The Imp With Ring (Guide page 104) and the Imp Farmer (Guide page 108) cannot be killed by monsters on this map, so if they pull several Earth Elementals, either reload or stand off and shoot the weakest ones before the Imps kill them, causing you to lose any potential XP.
Pickled Herring Tavern
Sir Patrick's Gems (Guide page 132)
In the chest with the Crystal Fragment, first take the Crystal Fragment, then close the chest. One random item will be generated and placed in the chest. Re-open the chest to get that item before taking any of the gems to talk to Sir Patrick.
The Imp With Ring (Guide page 104) and the Imp Farmer (Guide page 108) cannot be killed by monsters on this map, so if they pull several Earth Elementals, either reload or stand off and shoot the weakest ones before the Imps kill them, causing you to lose any potential XP.
Pickled Herring Tavern
In the chest with the Crystal Fragment, first take the Crystal Fragment, then close the chest. One random item will be generated and placed in the chest. Re-open the chest to get that item before taking any of the gems to talk to Sir Patrick.
Comments
Post a Comment