Battle for Middle Earth - Evil Campaign Map - Helm's Deep (+50 Command, +1 Power)
This is a hint/walkthrough post for Battle for Middle Earth. You can find an index of all our Battle for Middle Earth posts here.
Since you start the map with Rohan boxed in at Helm's Deep, this is an easy mission unless you want to complete the bonus objective -- to capture Helm's Deep before (both) reinforcements arrive -- in which case it becomes moderately difficult, but still easily doable since you will get the bonus even if the Surivivors from Fangor (Ents) arrive as long as you finish before reinforcements from Rohan arrive.
By now, both the armies of Saruman and Lurtz should have Pikemen and Wargs in their armies, which makes them strong against Rohan (and Gondor). From this point in the game, focus on one army to continue conquering territories with Isengard to maximize veterancy. Lurtz is an easier choice to play as he provides a +100% Damage passive Leadership bonus. Saruman requires more micromanagement as his powers are strong single strikes. You will probably have enough crossbowmen to kill any warrior heroes without either Lurtz or Saruman, so they are not a particular concern.
On my first attempt at Helm's Deep with Saruman, I stormed the main gate with a bomb and tried to strategically take command of units with Saruman. I still managed to complete the mission with all units surviving and before both sets of enemy reinforcements arrived (although you are still awarded the Bonus Objective if the Ents from Fangorn arrive but the reinforcements from Rohan have not).
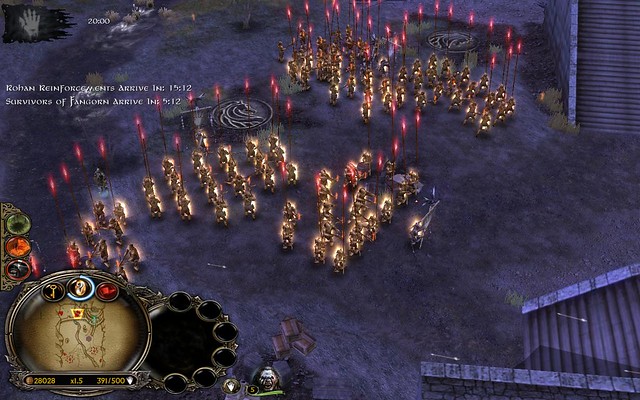
The second run was with Lurtz, who helpfully levelled up from 4 to 5 and thus got his passive +100% damage Leadership bonus going. This time, I did not build any bombs and just had five ballistae bombarding the west wall. There is a section with an unused Building Site and Legolas standing on top. This is one of the thinner wall sections, and when it comes down, it opens a fairly wide breach.
As soon as it comes down, the enemy archers will swarm out like a tide and if you do not have crossbowmen to bottle them up, it will be annoying trying to chase them all down.
The main advantage of this route is that you can destroy their ability to produce troops by destroying all the farms there. Then, the wall separating that area from the keep is fairly easy to clear because you have a wide front to assemble your troops.
With this approach and Lurtz, I captured Helm's Deep and defeated all enemy Heroes with over a minute to spare before the first reinforcements from Fangorn could arrive.
Whichever route you take, be careful with your Wargs because they are quite vulnerable to archers. Do not use them for deep strikes because you will probably lose a whole unit or two if they get tangled up trying to kill a hero and take too many hits from archers.
I used them to quickly trample and clear archer clumps and small horseman teams(supported by Lurtz, who can run a lot faster than my Pikemen-Archer Hordes, to shoot them down) on the walls to help my crossbows advance.
Against horsemen, set your Warg teams to run through and behind them so that you are mixed up with them as well as at front and side. This way, more of your Wargs can engage the horseman on the narrow wall.
If you decide to use bombs, you will probably need to clear the nearby walls as you must Deploy the bomb first once you get it to where you want it. If the bomb carriers are killed, the bomb disappears harmlessly.
Because the enemy has a longer range with their archers, depending on which section of wall they are at, they can actually hit your crossbowmen from behind the wall and not have to go up onto the battlements at all. Also, unlike at a regular walled camp or castle, on this map a ballista cannot attack anyone on top of a Helm's Deep wall -- it can only attack the wall.
The most reliable place to plant a bomb is at the main gate, where the enemy archers must go atop the walls, although you will probably have to clear the hero Gimli first. Then, instead of running a Berserker (which requires a level 2 Uruk Pit to recruit) to set off the bomb, shoot it with fire arrows or a fireball from Saruman.
Your troops will try to shoot gate doors as active enemies. You cannot therefore simply use an Attack Move or Guard and expect them to target only enemy units.
The overlapping passages can also be tricky for pathfinding to decipher if you click on them. Instead, click on an unambiguous section, or an enemy unit, to make sure your troops are getting to the correct location.
Gimli will not leave the gate even if all other troops have left and the fighting is inside the keep elsewhere. You will have to stop by and kill him if he is still standing there.
After you kill all heroes, you will not be notified that you have completed that Bonus Objective. You will, however, be awarded it during the statistics summary at the end.
Comments
Post a Comment